first signs of the "rust devil"
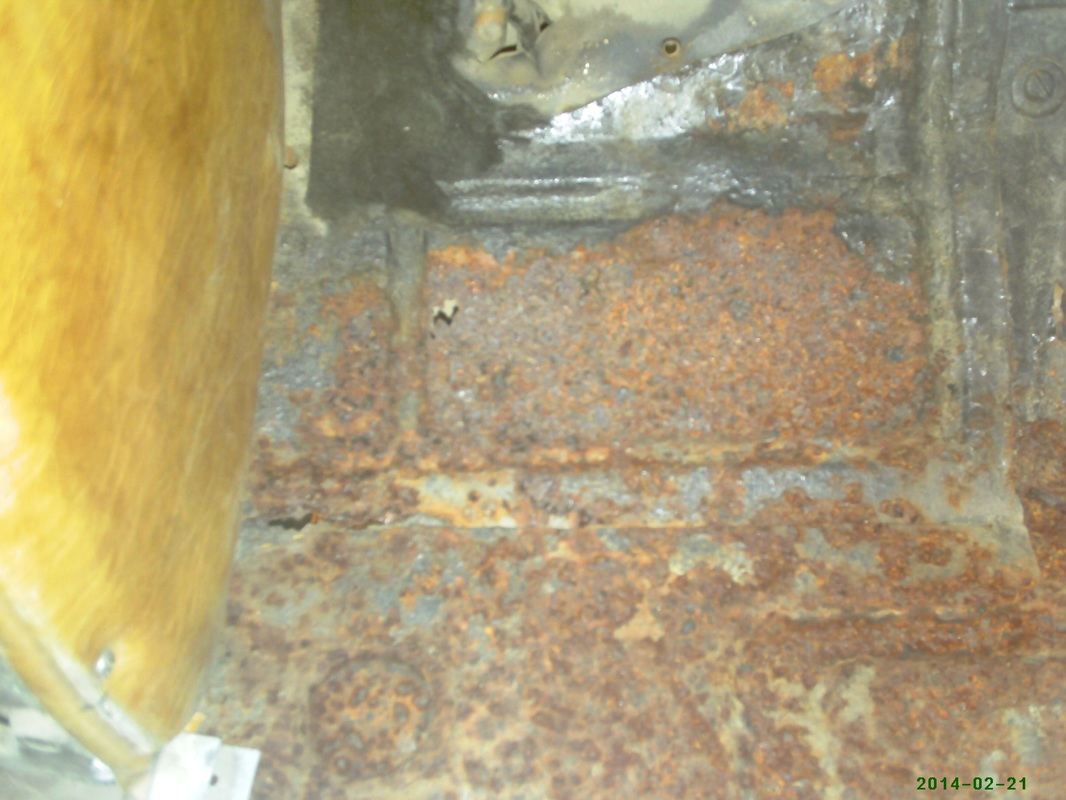
Left Front
At first look, the body appeared rust-free despite having lived its life on the salted roads of Minnesota. Removing the carpet revealed the ugly truth.
|
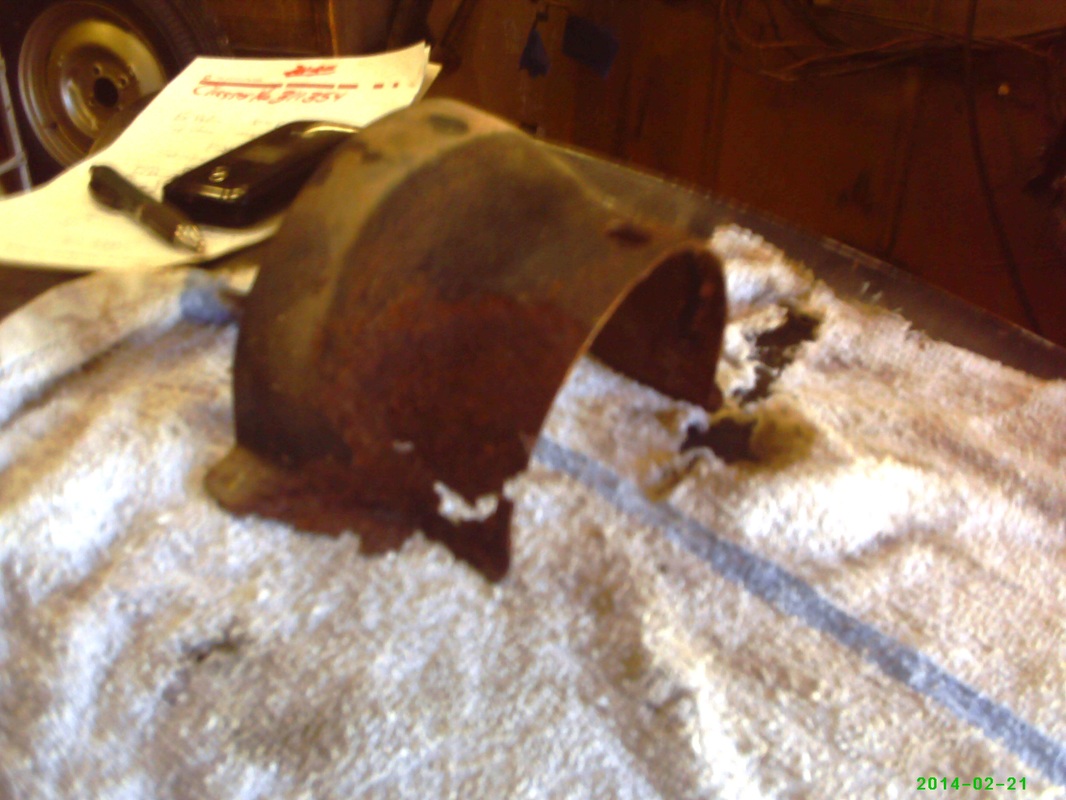
hump day
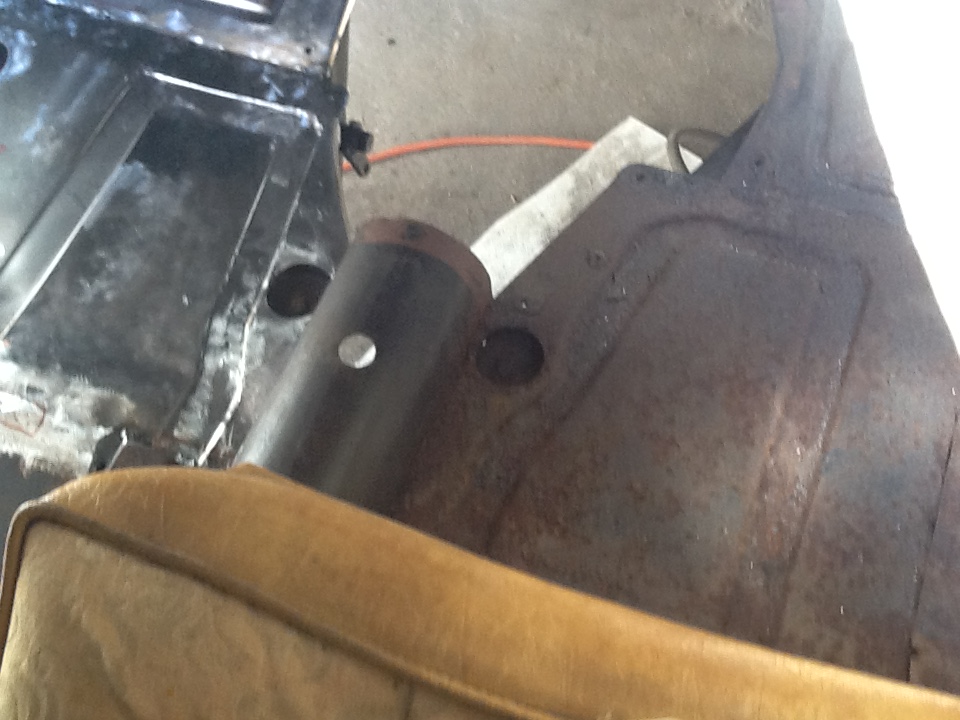
Even this piece which covers part of the gearbox had rusted through
|
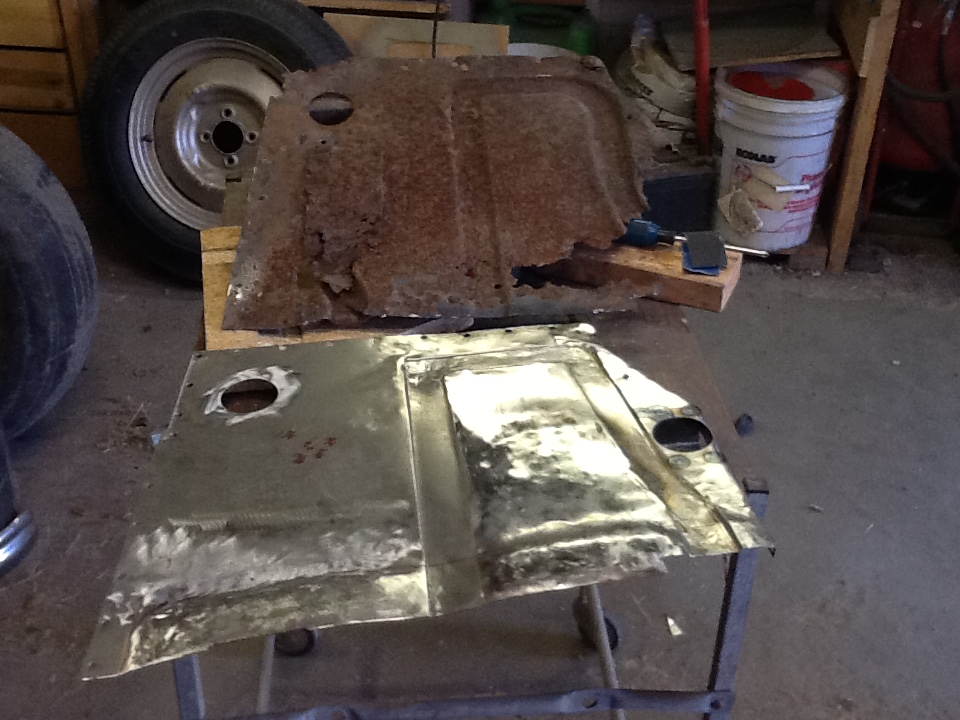
old vs new
There are very few replacement body panels available for these cars, and no floor pans, so I hand formed this piece using the flange attachment on my Harbor Freight bead roller. Here's the new piece compared to the old.
|
New Floors Go in
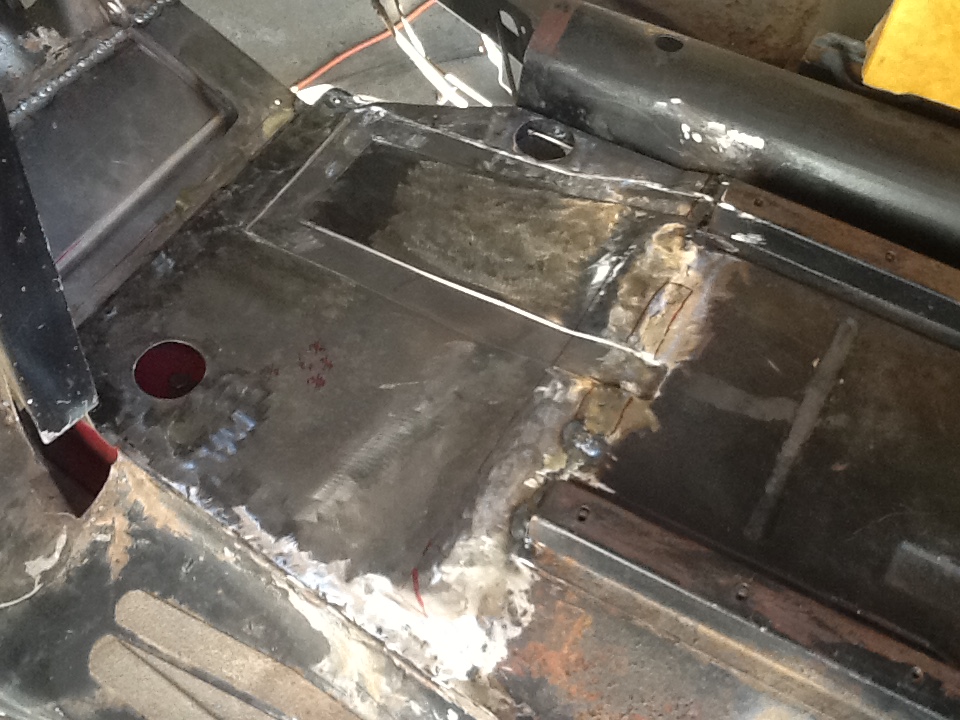
Here is the new floor pan welded in. There was another channel extending from the other seat riser which I did not see on the old rusty panel. More on that later. The piece above in the upper left part of the photo was also made on my bead roller and welded in. You can also see in the lower left of the photo, the portion of the door post that had to be removed, it is where the the lower door hinge is located.
|
Here's a comparison between the new floor pan on the left and the old floor pan on the right. The right side was eventually cut out and replaced also. The easiest way to do this in grind along the edges of the panels, and look for the low spots which will be the original spot welds. Drill them out with a spot-weld cutter or sharp drill bit. I found drill bits to work quicker, starting with about a 3/16" then finishing with a 1/4" or 5/16" depending on the size of the spot weld.
|
