Tail panel repair
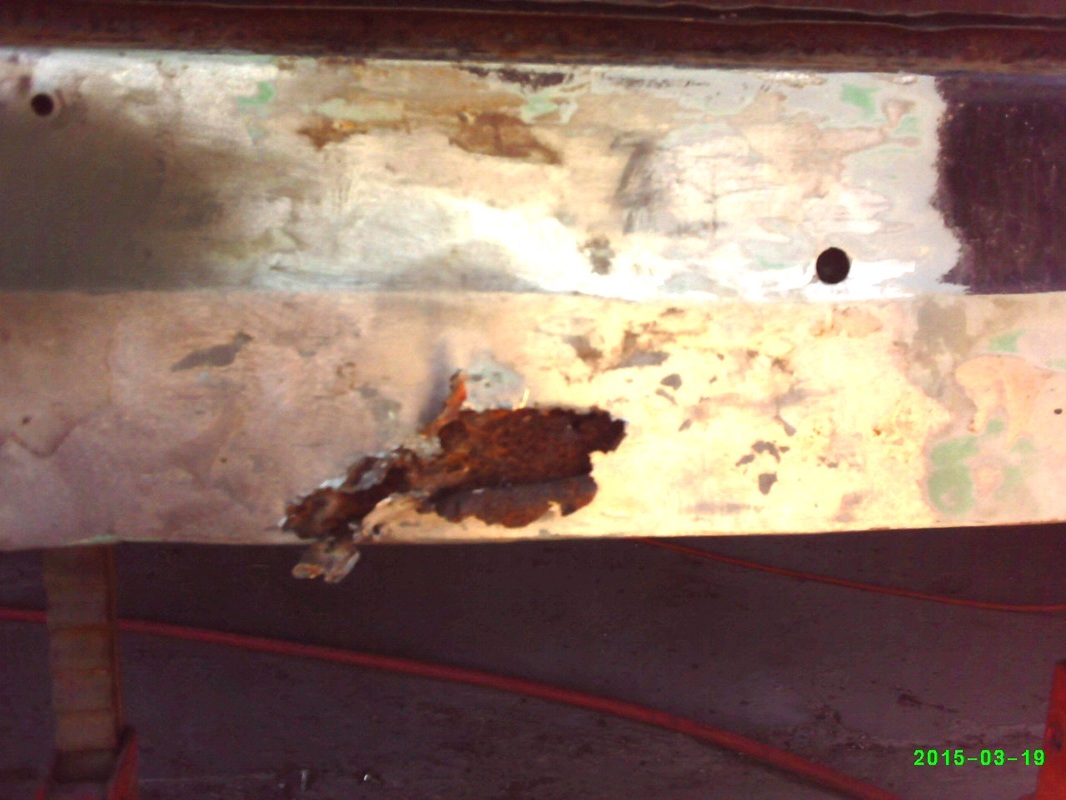
lead the wayWhat started out as a half-dollar sized hole in the tail panel, quickly evolved into much, much more...including about a pound of lead filling.
|
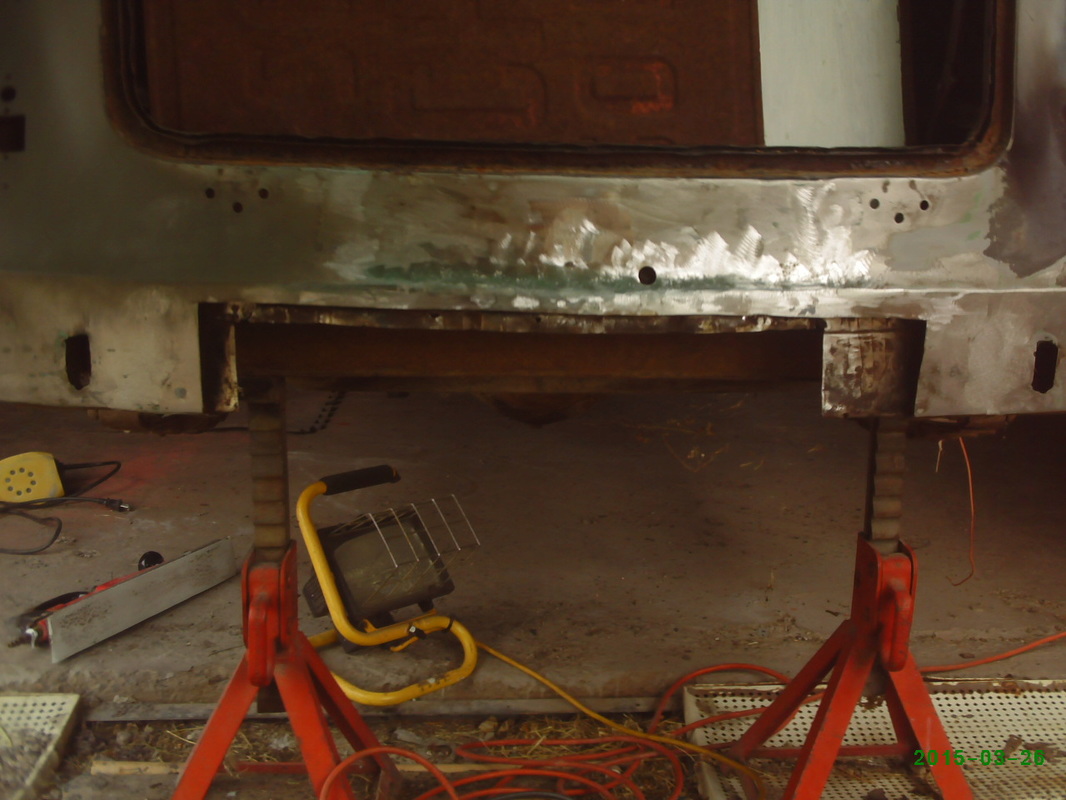
"cut-away" view
When it was all said and done, three-fourths of the tail panel and the inner panel had to be cut out.
|
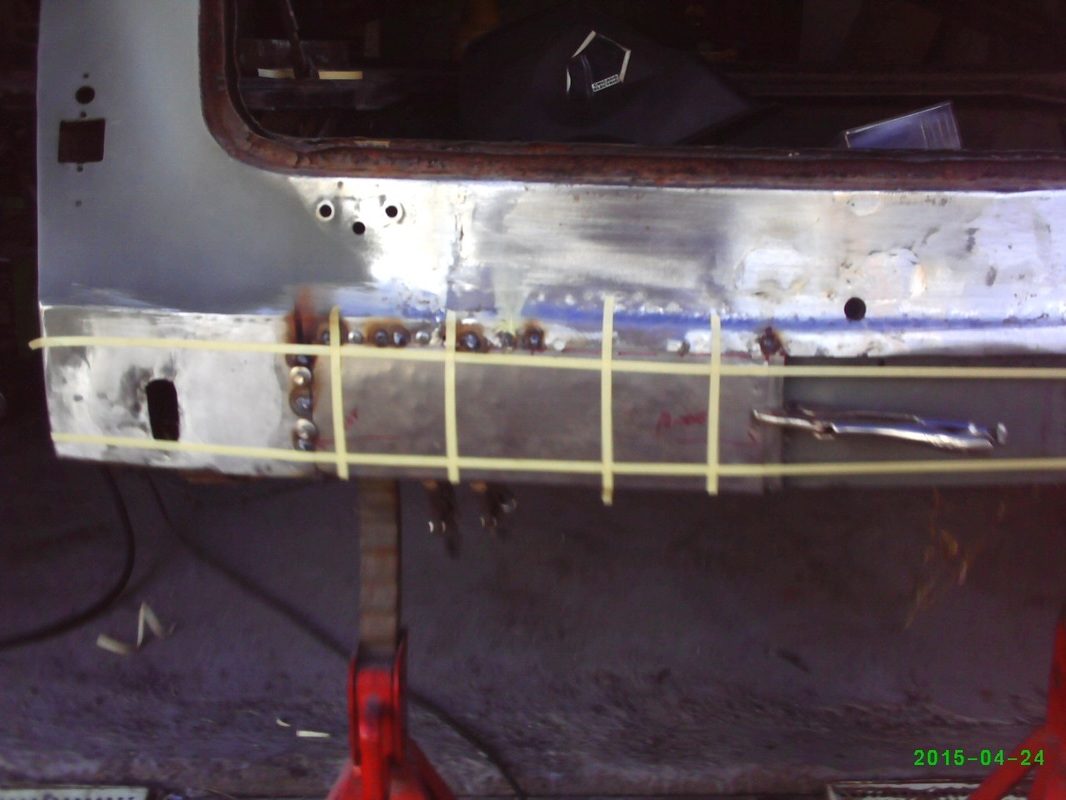
new panels fitted
Once the inner panel was formed and welded in place I began to form the outer panel. I did it in two pieces for two reasons - I couldn't find sheet metal over 48" wide, and it made it easier to fit and shape using two pieces. I also welded a brace in the middle to add strength and to give me something to weld the ends to. I used masking tape to make sure I followed the body contours while fitting the new pieces.
|
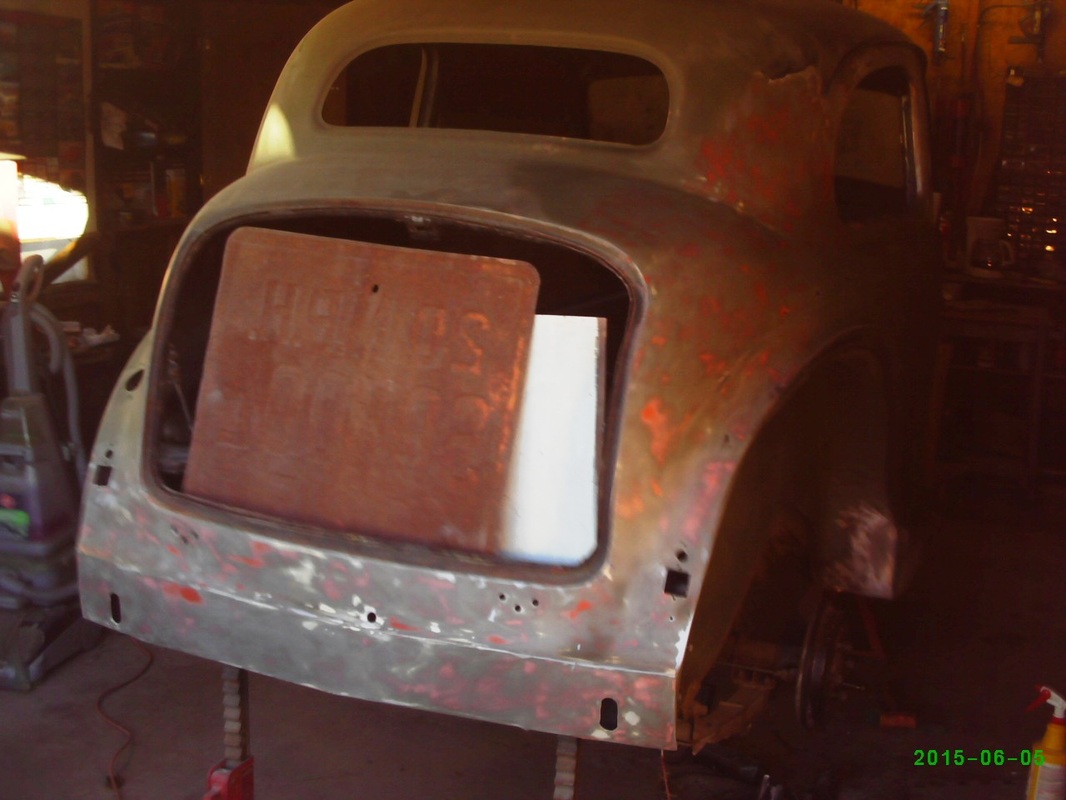
Ready for finishing
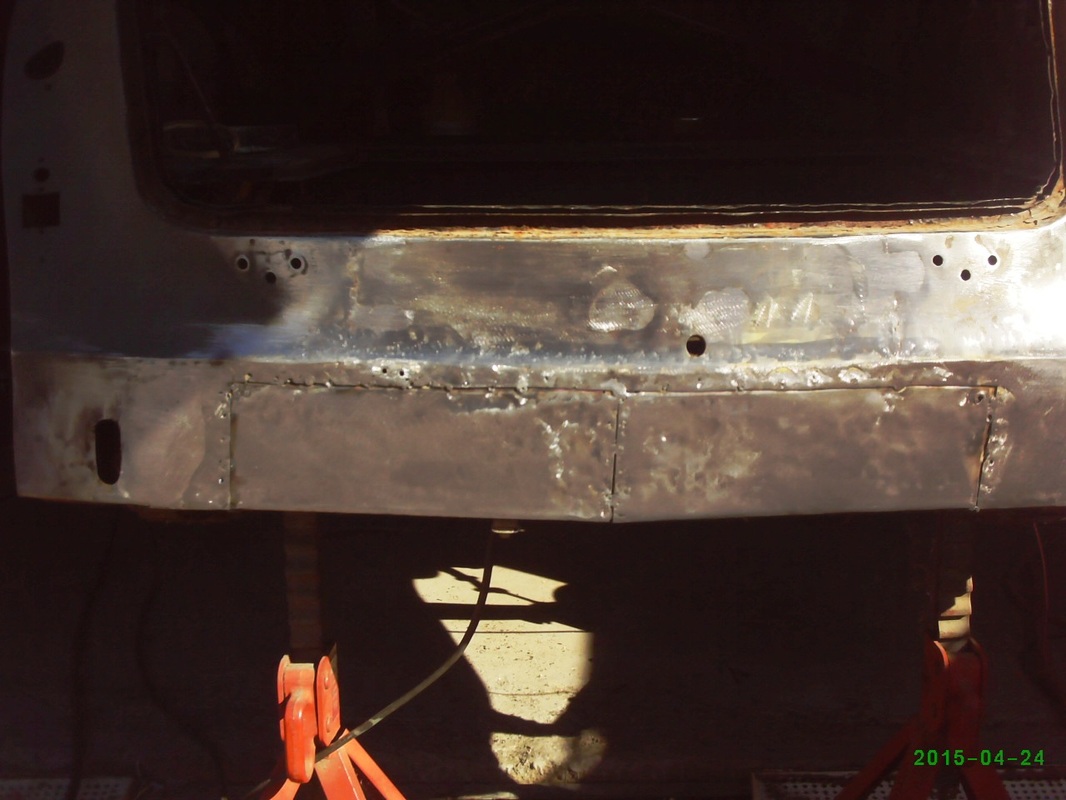
Here are the two pieces welded in. I finished the seams with fiberglass reinforced body filler as I did throughout the car. Once satisfied that everything was smooth and flush, I applied a couple full skim coats of plastic body filler followed by numerous spot coats. In between, I lightly hammered out the high spots until I had a smooth, glassy finish.
|
Here is the "almost" finished shot. The red areas are spot putty used to fill sanding scratches and tiny pinholes in the body filler. The hardest part of this was keeping the body line at the top of the panel straight and even. I had to re-work this area several times to get it right. Use the palm of your hand versus your finger tips when checking for smoothness of your repair, you'll be amazed how many minor imperfections you'll feel. This is imperative in all body work and especially on large flat areas such as this. Any high or low spots will show up as "bumps" or "bruises" through your paint job.
|
