Bit by bit, piece by piece
Seemed simple at first, but...
At first, I thought I could do this repair with three or four large pieces. It soon became evident that was not going to be the case. There were too many curves and corners to facilitate using large patch panels. This turned out to be among the largest pieces that I was able to use. It covered the front half of the rear differential hump.
|
Welding and forming
I was also able to use fairly large pieces on the passenger side floor and back panel. The rest had to be filled in with smaller pieces, most of them about 3 or 4 inches in width and length. I also found, while trying to weld the pieces in, that the surrounding metal was so thin it would just dissolve. This had to be remedied by adding even more small patch panels.
|
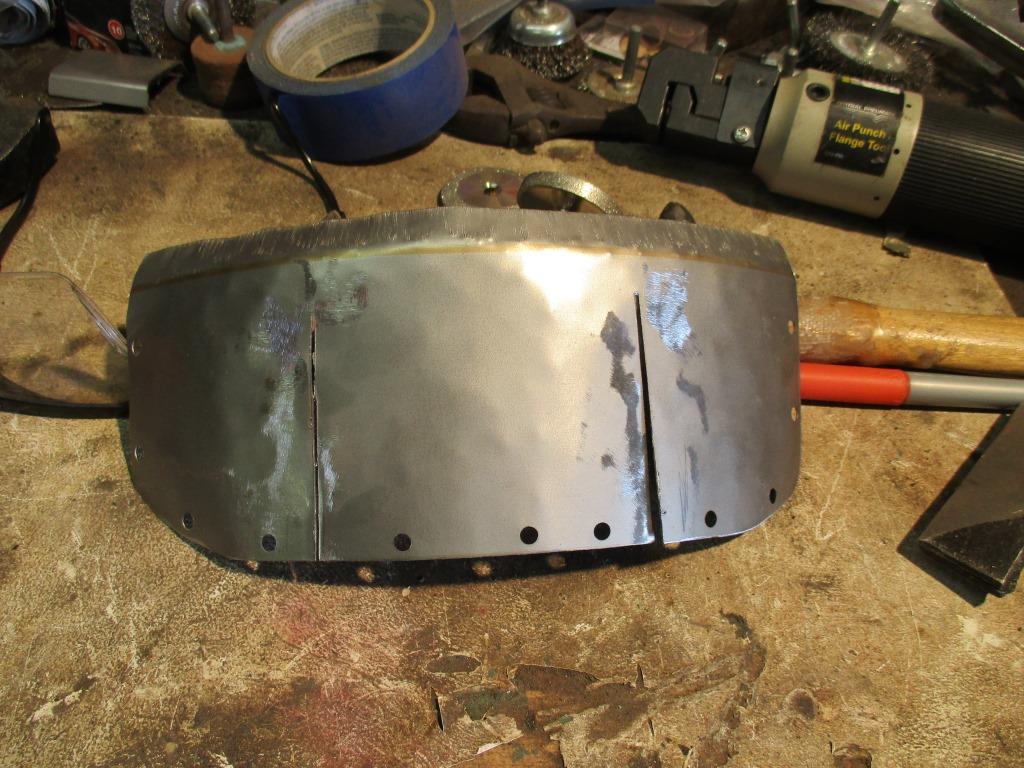
Any Knight would be embarrassed
Looking like a poorly executed suit of armor, I had to make 5 separate trapezoid-shaped pieces to cover the middle part of the differential hump. Even so, it took a lot of hammer forming after each tack weld to get everything to form-fit. If someone made a rear seat pan replacement panel, this job would have been much easier, but there are too many curves and shapes to try to reproduce the entire thing from a flat sheet of steel - at least for my skills anyway.
|
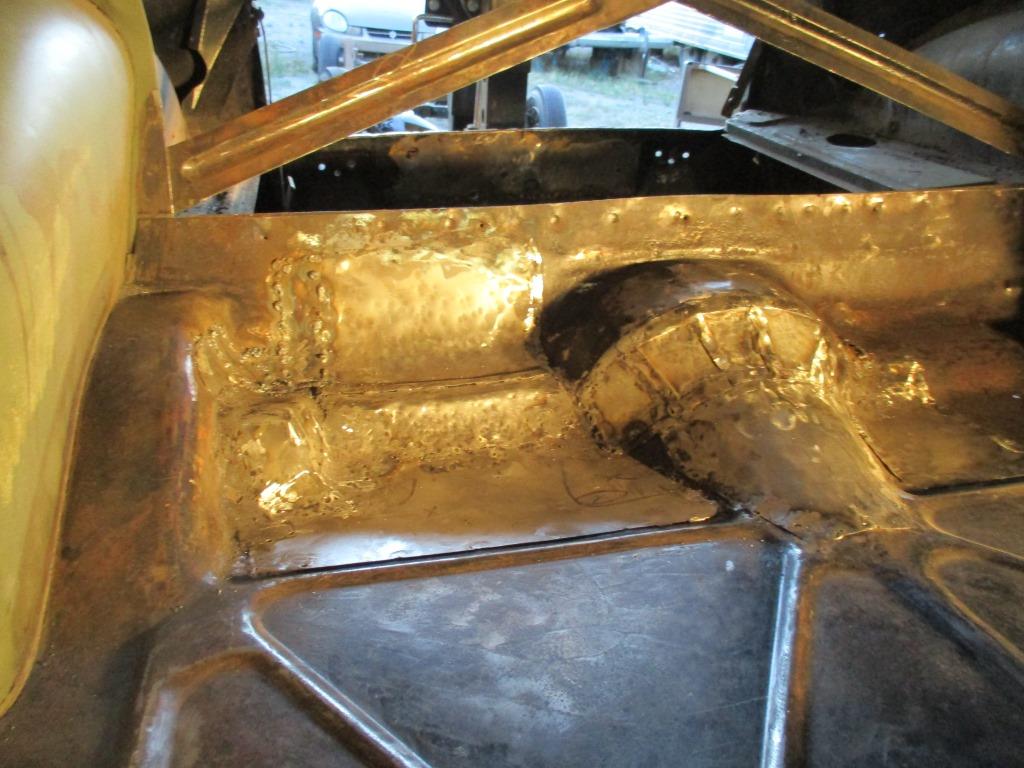
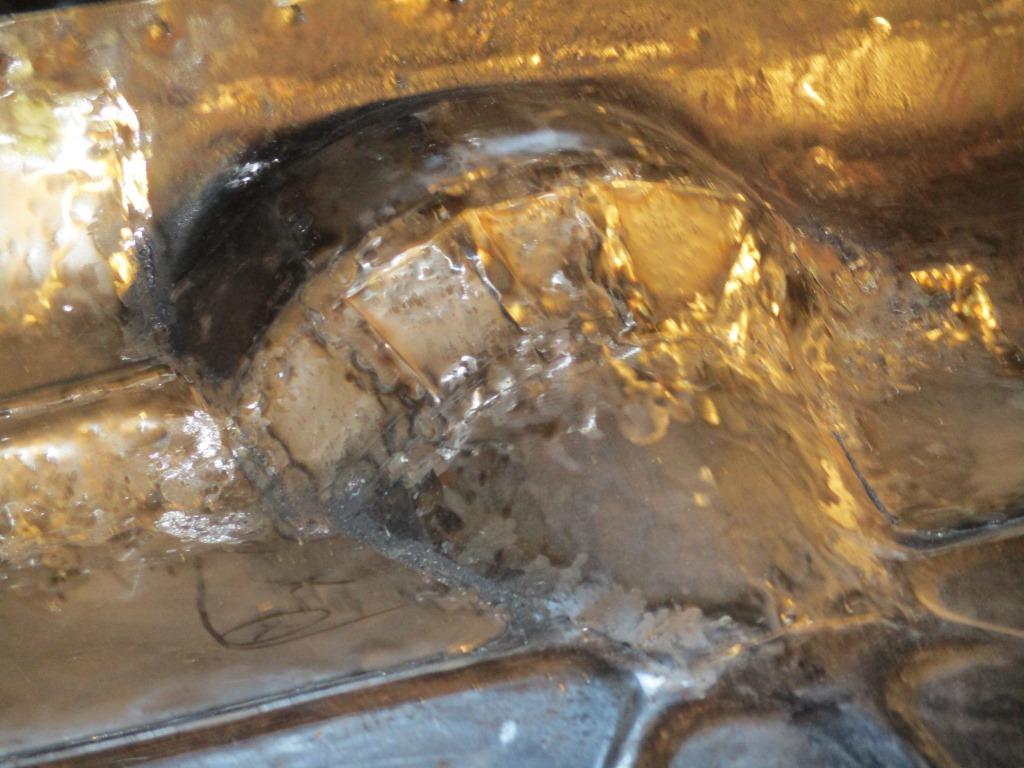
Now to the underside

Here is what the welds looked like from the underside of the car. The "hot spots" indicate good penetration of the patch panels. Now to grind everything smooth, and work the panels from the underside to get them back into shape as close as possible to original before applying filler into the holes. The whole purpose of welding the panels on the inside was to give my fiberglass filler some backing to adhere to when I push it into the numerous pinholes. Then I will smooth out the filler, and hopefully when complete, the floor will look as smooth as it was from the factory with no signs of the "rust worm." The inner panels will be concealed by the rear seat after it is installed.
|
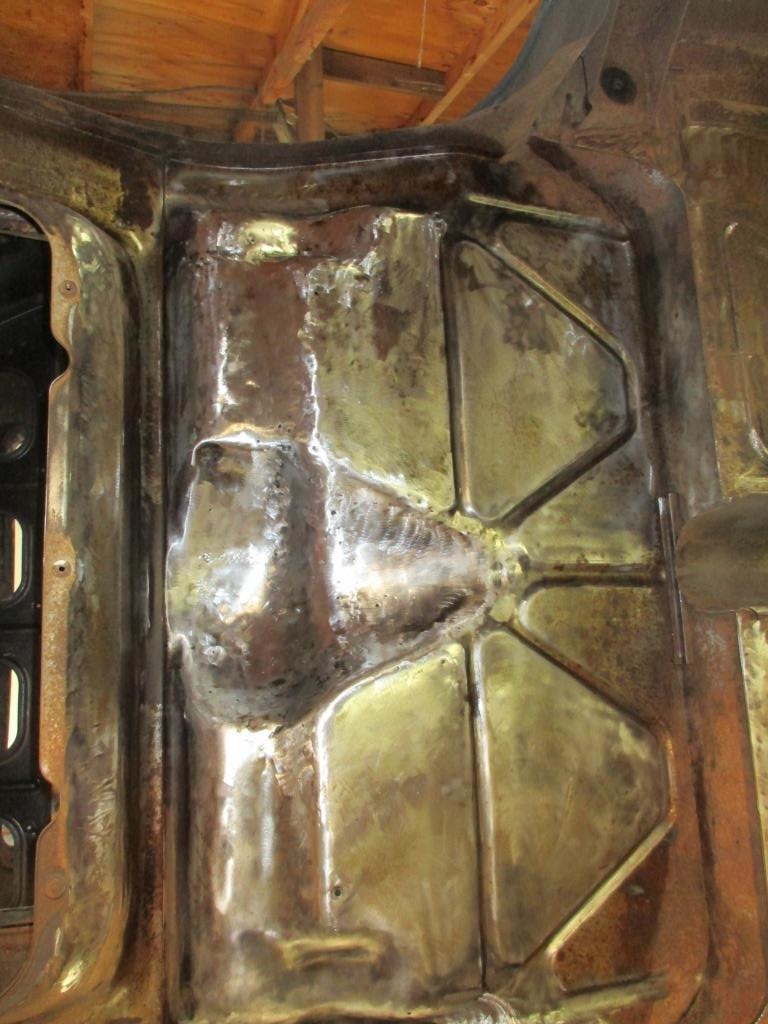
Got the welds ground smooth, the panels re-shaped with body hammers, and now I will begin to fill the tiny holes with fiberglass reinforced body filler, then sand it all smooth. The goal here is to conceal the rust holes and make the underside appear untouched by time. Having the body on the rotisserie has, as you can imagine, made this job 200% easier. The wooden structure at the top of the photos is the garage ceiling!
|
